.JPG)
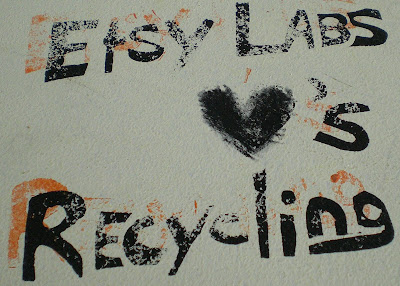
.jpg) We chose to make a couple stamps for our recycled shipping envelopes:
We chose to make a couple stamps for our recycled shipping envelopes:.JPG)
23 May 2007
Make your own stamps and prints!
your friend,
Mary Andrews
at
1:43 PM
63
comments
![]()
22 May 2007
Etsy Labs welcomes the Philidelphia street team!!
The Etsy Labs has been working hard this year to bring a monthly Street Team invitational Trunk Show and Band to the Labs the last Friday of each month! We'd like to kick off the series with a bang and invite all of you who can make it out to help us welcome the Philly street team this Friday the 25th at 7pm: If you're in town, please join us at the Etsy Labs and enjoy some great art, listen to good music, meet some new folks and awesome Etsy sellers...and of course partake in the free spirits! See ya there at 7pm!
Questions? labs@etsy.com
your friend,
Mary Andrews
at
6:16 AM
13
comments
![]()
21 May 2007
Etsy Craft Extravaganza!
Wow, I really can't say enough about what a wonderful event the Etsy Michigan Street Team put together in Detroit this past weekend! They organized a large Craft show that represented Etsy sellers in the area! Lauren (Stellaloella) and I flew to Detroit to help represent Etsy among so many amazing sellers! The event took place in a large theatre on one of the cutest little "Main Streets" we've ever seen! We are more than proud of the Etsy Street team (a huge thanks to Danielle and Heidi who organized the event) for getting together with this idea and really joining forces to make something happen in their area...this was an outstanding representation of their team and I cannot say it enough how proud and impressed we are.
I thought you guys might enjoy seeing some pics from the show:
Here's Lauren helping me set up the official Etsy table at the beginning of the show and a peek at what the table looked like in the morning:.JPG)
.JPG)
.JPG)
.JPG) They even had a local radio station come out and represent at the show:
They even had a local radio station come out and represent at the show:.JPG) The more shows we visit, the more Etsy babies we find all over:
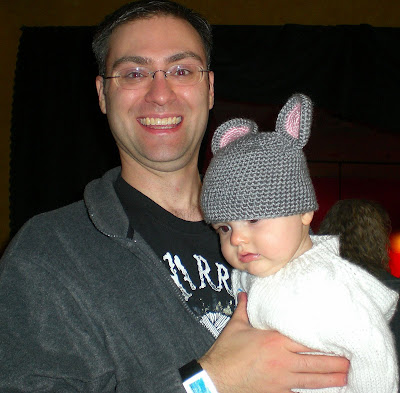
The more shows we visit, the more Etsy babies we find all over:.JPG) There's another Etsy baby and Daddy winning one of the hourly free raffles that were going on:
There's another Etsy baby and Daddy winning one of the hourly free raffles that were going on:.JPG) There were so many crafters, that the tables spilled out from inside the theatre to the outside sidewalks!
There were so many crafters, that the tables spilled out from inside the theatre to the outside sidewalks!Whew! What a truly wonderful weekend Lauren and I had meeting so many of you Etsy sellers! It was so nice putting faces to names and to give you guys a chance to see some our faces behind Etsy!! Lauren and I both talked the whole way to the airport about how wonderful it was to see Etsy represented so well by you guys and realizing that there are so many more sellers just like you that are really taking initiative and doing something positive with their time all over the world! I hope one day we will be able to meet you all!
Keep up the good work guys!
your friend,
Mary Andrews
at
9:57 AM
12
comments
![]()
17 May 2007
Conde's Purple Heart
A special Thanks to clevergirl.etsy.com for taking initiative and putting together the following event:
 The above event (click to enlarge) was born out of a forum thread that celvergirl happened upon and she says:
"Earlier this week someone posted (a thread) asking for help in getting her husband the Purple Heart he has more than earned and deserves. I signed the petition...There are too many people in this world that do good and get ignored...with in their time of need. Thus, CraftLove was born. And Specialist Conde is the first project. It's not about war. It's not about hate. It's not about choosing sides and who is right or wrong. It's about making something out of love and sharing it with someone who could really use it. So here's the first "challenge" We, the people, will give Specialist Conde his purple heart."
She has put together this beautiful collage of a lot of the outpouring of several Etsy members who have gotten involved in the project and made purple hearts to send in the box:

To read more about clevergirl's special project and the event where all of the purple hearts will be on display, you can find her blog here.
your friend,
Mary Andrews
at
6:19 AM
8
comments
![]()
Labels: Events
15 May 2007
Woodblock Printing class from this weekend
.JPG)
.JPG)
.jpg)
.JPG)
.JPG)
.JPG)
.JPG)
.JPG)
.JPG) We had so much fun and got tons of printing accomplished at the same time! If you'd like to join the fun and take a class at the Labs, you can sign up for one by clicking here. If you'd like to see more work from the instructor, Marissa, check out her amazing images and goodies in her Etsy shop, MLee.etsy.com!!
We had so much fun and got tons of printing accomplished at the same time! If you'd like to join the fun and take a class at the Labs, you can sign up for one by clicking here. If you'd like to see more work from the instructor, Marissa, check out her amazing images and goodies in her Etsy shop, MLee.etsy.com!!
your friend,
Mary Andrews
at
11:15 AM
6
comments
![]()
14 May 2007
Rings made at the Labs!
.JPG)
.JPG)
.JPG)
.JPG)
If you'd like to learn some basic skills for working with metal and creating your own fabulous jewelry, I hope you will check out the workshops and classes section of our shop and sign up for a class! There are still two more metals classes in this series available with more in the works later in the Summer!
your friend,
Mary Andrews
at
10:49 AM
7
comments
![]()
This Week's Skill Share!
- Wednesday at 6pm, Mary will be leading a skill share on creative ways to use shredded paper, so if you're coming for tea, hang out after and join in!
Hope to see you at the Labs this week and stay tuned for pictures from this past weekend's workshops!
your friend,
Mary Andrews
at
8:44 AM
6
comments
![]()
Labels: skillshares
11 May 2007
Plushie Tutorial!
.JPG)
Here's what you'll need: colored felt and fabric, needle, thread (matching body design), scissors, buttons, stuffing, and a sewing machine (optional if you are an efficient hand-sewer):
.jpg)
.JPG) Step 1: Cut out desired shapes of both leaves and body of carrot while leaving a little room (making it fatter) on the edges to allow for sewing. You can either draw your desired shape on the fabric and cut it out or cut it free form:
Step 1: Cut out desired shapes of both leaves and body of carrot while leaving a little room (making it fatter) on the edges to allow for sewing. You can either draw your desired shape on the fabric and cut it out or cut it free form:.JPG) Step 2: Run leaves through sewing machine to add desired embellishment detailing with stitching:
Step 2: Run leaves through sewing machine to add desired embellishment detailing with stitching:.JPG)
.JPG) Step 3: Make sure the "wrong sides" (the side you don't want showing) of the carrot are facing outwards on both sides and sandwich the leaves between them. You will want to invert the leaves on the inside of the carrot facing down with the base of them sticking out a little past the edges of the carrot fabric sides:
Step 3: Make sure the "wrong sides" (the side you don't want showing) of the carrot are facing outwards on both sides and sandwich the leaves between them. You will want to invert the leaves on the inside of the carrot facing down with the base of them sticking out a little past the edges of the carrot fabric sides:.JPG) Step 4: Pin your fabric in place securely and begin to slowly run it through the machine on the edges of the carrot fabric. (I prefer to start on the side of the carrot and work my way around the top where the leaves are):
Step 4: Pin your fabric in place securely and begin to slowly run it through the machine on the edges of the carrot fabric. (I prefer to start on the side of the carrot and work my way around the top where the leaves are):.JPG)
.JPG) Step 5: Stop sewing when you reach around the side of the carrot that you began with leaving an opening in the same side:
Step 5: Stop sewing when you reach around the side of the carrot that you began with leaving an opening in the same side:.JPG) Step 6: Turn carrot completely inside out and begin to slowly stuff it with your polyfil or desired stuffing material:
Step 6: Turn carrot completely inside out and begin to slowly stuff it with your polyfil or desired stuffing material:.JPG) Step 7: After stuffing the carrot to your desired fill, sew up the opening in the carrot by hand with needle and a thread matching the body of the carrot. You will want to sew the sides as close to the seam as possible, trying to conceal the stitching:
Step 7: After stuffing the carrot to your desired fill, sew up the opening in the carrot by hand with needle and a thread matching the body of the carrot. You will want to sew the sides as close to the seam as possible, trying to conceal the stitching:.JPG) Step 8: Tie a knot in the thread when you have finished stitching the opening tight and trim all loose threads, and any stuffing that may be on the seam:
Step 8: Tie a knot in the thread when you have finished stitching the opening tight and trim all loose threads, and any stuffing that may be on the seam:
your friend,
Mary Andrews
at
11:45 AM
24
comments
![]()
Labels: skillshares, Tutorials
.JPG)
.JPG)
.JPG)
.JPG)
.JPG)
.JPG)
.JPG)
.JPG)
.JPG)
.JPG)
.JPG)
.JPG)

.JPG)
.JPG)
.JPG)
.JPG)