Showing posts with label Tutorials. Show all posts

24 July 2007

TRASHION: How to make a long halter tunic from a t-shirt

So, I made one of these a bit ago, and EVERYONE wanted to know how to make their own. So, in honor of the Trashion trunk show/art party (happening here on Friday, July 27 from 6-8PM), here it is, guys. All you need is a t-shirt, scissors, thread, and a sewing machine (and you could prolly do it by hand if you want). Arright, let's begin!


Here's the "before"


1. With the tee inside out, stitch the sleeves closed.


2. Cut off the top in a straight line, just below the neck band. Cut off the sleeves, leaving about 3/8" seam allowance.
3. Try the shirt on inside out. Pin the sides to fit.


4. Sew along where you've fitted, all the way to the top edge, and backstitch.


5. Trim the seam allowance to 3/8". Press the seams open.


6. Turn the shirt to the correct side. Make two tiny holes (it will stretch) near the top of the shirt for the straps.


7. Cut off the hem and string through the holes. Tie several knots on each side to hold.


AND DONE!

to get to the Etsy Labs for the Trashion show!
325 Gold St. 6th Floor
Brooklyn, NY 11201

16 July 2007

Tutorial: Making and Applying Appliques

How to make and apply an appliqué to fabric:

Here's what you'll need:
  • iron
  • ironing board
  • assorted fabrics
  • thread
  • embroidery floss (optional)
  • sewing machine (optional)
  • scissors
  • fusible interfacing (look here)
  • buttons (optional)
Here's what you do:

step 1: First you will need to have an idea of what you want your appliqués to be shaped like, how many pieces you want, and it is a good idea to make a sketch or sketches of each piece.
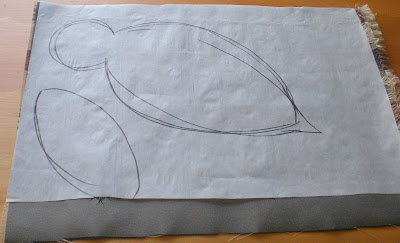
step 2: Cut out squares of the fusible interfacing big enough to hold the area of your sketches. To save interfacing, try sketching your applique idea onto the back (smooth side) of the sheet and cutting out the square around it.

step 3: After you have your squares of interfacing cut, place them rough side down on top of the designated color fabric that is on your ironing board. The fabric should be "right side" (the side you want to show) facing down towards the ironing board. Make sure your fabric is a little bit wider than the squares of interfacing so the ironing board doesn't get sticky!
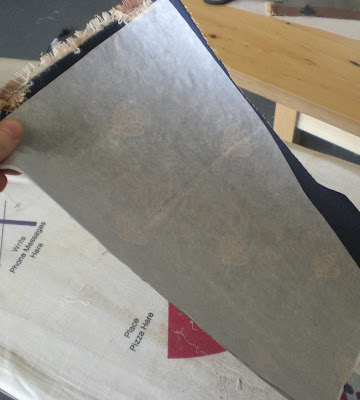
step 4: Now make sure your iron is heated up and set on a silk setting. Start gently gliding the iron over the fabric with the smooth sided interfacing on top. As the paper becomes flatter you can apply more pressure with constant iron movement. This should only take a 2-5 seconds and you will notice the paper adhering to the fabric and becoming one stiffly bonded piece.
step 5: Set down the iron (but keep it on) and start cutting out the desired appliqué shape from the fabric/paper sandwich (I chose a bird on bee printed fabric). Once you have your shapes cut you are ready to adhere them onto anything now!! A bag, shirt, tote, more fabric, pants, skirt, cardboard, and some pieces of wood!
hint: If you don't want to attach them to anything, you can give just the appliqués as presents or sell them alone for other people to use them for their own crafty projects. Just leave the paper on the back of the patch and viola!
step 6: So you're ready to attach your appliqué? We'll use a tunic in this example (the tunic is actually one I reconstructed from another skillshare showing up later this week). Place your tunic flat on the ironing board positioned where you want your appliqué to sit. Run the iron over it a couple times to make sure it is smooth and warms up the surface a bit. Peel off the paper backing from your appliqué and you will notice a clear sheen adhesive bonded to the fabric. Place the bonded side down onto the shirt flat.
step 7: Iron on top of "appliqué/tunic sandwich" keeping movement. As the fabric heats up apply more pressure. Check to see if fabric and appliqué are bonded well; you might have to check a couple times before getting it just right. Once fabric is bonded set down iron and turn off.
hint: You have now successfully bonded your appliqué to your shirt! You can leave it like this if you want, but for a more secure, structured, and detailed appliqué...keep reading.
Step 8: It is now time to reinforce your bonded appliqué with sewing. You can hand sew the edges of the appliqué with either thread or embroidery floss, or you can run it through the sewing machine like we have pictured below. Get creative with your sewing using different threads, colors, and stitches. You can also use buttons to add details like eyes, bubbles, and other round imagery!
You now have a new perfectly appliquéd item! This technique is so great for dressing up old clothes, totes, curtains, etc....get creative!
*Note: Once you have appliquéd clothing, the washing instructions may change due to the material you have chosen to adhere. For best results, hand wash appliquéd clothing!

06 July 2007

How to Make Lip Balm

Lip balm is surprisingly easy to make. We made lip balm using the easiest/quickest/laziest way possible that involves all common household tools. We'll also be covering the proper, slightly more involved method of lip balm making (noted in italics).

What you'll need:
-lip balm base or waxes+oils+extras (see The Slower Way, below)
-essential or flavor oil(s)
-pipettes (one for each flavor )
-microwave or double-boiler (see The Slower Way, below)
-glass measuring cup with pouring spout
-spoons or spatulas
-lip balm tube holder (optional, but I'd highly recommend it, if you're filling a great quantity of tubes)
-lip balm tubes, jars, pots, lids, bottle caps, etc.---any container that you would like to use for your lip balm
-shrink bands for sealing containers (optional--but recommended, if you're going to be selling your lip balm)
-newspaper or craft paper to cover your counters
-towels for cleaning up


The Fastest Way

Step 1: Preparation
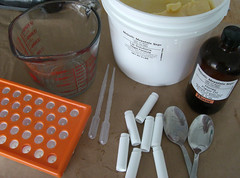
(a) Buy your supplies. Listed below are the sources that we used and can recommend from personal experience.

(b) Set up all the supplies you'll need on a countertop covered in newsprint or craft paper. You'll be glad you did this because lip balm can be hard to clean up if you make a mess. I would recommend working in the kitchen as close to the microwave as possible, since you'll be using it a lot, if you're following this method. Be sure you have all your supplies ready, including the containers you'll be pouring into. Once the mixture is melted, you'll need to work quickly, but steadily, so the mixture doesn't harden before it has been poured.

(c) Put on your favorite apron/lab coat, if you feel so inclined.


Step 2: Scooping
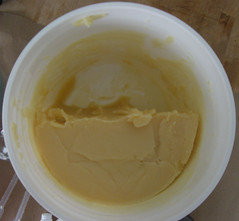
Scoop out your base into a glass measuring cup that has a spout.
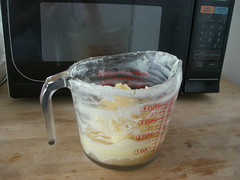


Step 3: Melting
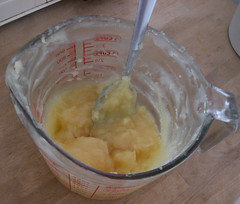
Melt the base in the microwave. Take out every 30-45 seconds and stir, so that the base is heated evenly.


Step 4: Flavoring
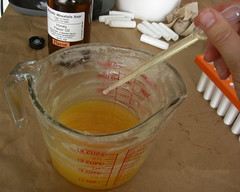
After the base has melted completely and has cooled very slightly, use a pipette to drop in the appropriate amount of flavor or essential oils. Use a different pipette for each flavor/scent that you use, so as not to cross-contaminate. The honey flavor oil we used called for 2-4% of flavor oil to base. 2-4% is a good rule-of-thumb for flavor. Essential oils need less, about 0.3-1.5%. The oils you choose may recommend different proportions, so check before you get started. Stir just until mixed.

It is important that you add your flavor/essential oil after you melt the base. If you add the flavor before you melt the base, it will lose its potentcy in the heating process.


Step 5: Pouring
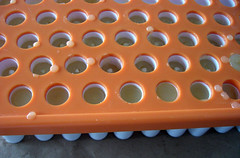
Using the very same measuring cup that you melted the base in, pour your mixed and melted concoction into your tubes or jars or what have you. That's why the spout is so handy. If you're using tubes, fill only to the top of the inside screw. Once the mixture has cooled, finish filling the tube. Pour almost all the way to the top, for that professional and rounded look. This process avoids the risk of cracking that can occur when filling the tube in one go. If you're using jars or lids, just pour all the way to the top in one pour.

Don't be discouraged if you make a mess when you first start pouring. After a few tries, you'll be a pro. It's all in the wrist.

I've read that you can transfer the melted lip balm mixture to the containers using plastic pipettes (but not glass), but I had no luck with that method. I found that the lip balm hardened inside the pipette before it could be dispensed.


Step 6: Labeling
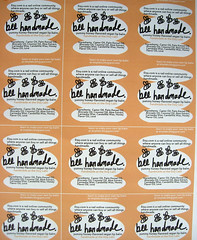
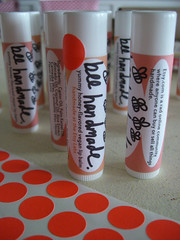
Make some sweet labels. Anda made these on Photoshop. Aren't they beeautiful?

Below are some examples of recycled containers for lip balm. We're currently trying to rack our brains for a good way to make the lid-container lip balm more transportable. Any ideas? Send them our way!
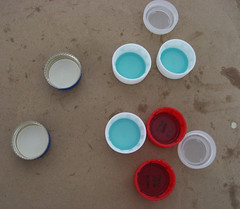
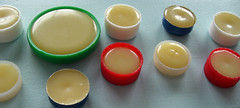

Step 7: Sell your lovely lip balm on Etsy or give it to all your friends!
If you're planning on selling your lip balm, there are some FDA guidelines that you need to keep in mind when creating the labeling and packaging. You can find the FDA's Cosmetics Labeling Guide here: http://www.cfsan.fda.gov/~dms/cos-lab3.html#clgk. We're not sure of the legalities of selling lip balm in recycled containers, so that is something to also consider.

The Slower Way & Other Tips
Don't be frightened, The Slower Way really isn't scary. Unfortunately we don't have pictures because we were too impatient to get crackin' on the lip balm production and we have a microwave, but not any sort of double-boiler.
1. Instead of buying a pre-made base, you can buy wax (beeswax, candelilla, carnauba) oil (safflower, sweet almond, coconut, castor) and other additives (such as vitamin E, shea butter, cocoa butter, colorant) from any of the suppliers below. You can either play around to try to find a consistency and combination that you find most pleasing or follow a recipe, which can also be found on those sites. A mixture containing more oils makes a glossier lip balm, while a mixture containing more wax and butters creates a more matte lip balm.
2. If you would like to add a hint of color to your lip balm, simply add some pieces of old lipstick during the melting step of the process.
3. If you would prefer not to use a microwave for melting, improvising a double-boiler is easy. You can either use (a) a saucepan or (b) an electric frying pan. Be sure to use potholders and be aware that boiling water is indeed HOT.
(a) Fill the saucepan partially, about a 1/3 of the way, with water. Place the glass measuring cup that contains the base (either the one you bought pre-made or concocted yourself from wax+oil+extras) in the water. Heat till simmering. Once the mixture has melted, pour into the containers, as detailed in The Fast Method (see above).
(b) Using a saucepan is essentially the same thing, except that you'll need need to fit the pan with a wire rack for the measuring cup to rest upon. Proceed as described above.
4. When using with the Fast Method, particularly, working in small batches is a good idea because (a) a small batch is lighter and easier to pour and (b) a small batch doesn't start to cool before you're done pouring.
5. Remember, although the process of making lip balm uses many household tools, be sure to keep these tools separate from your actual cooking tools. Use measuring cups and spoons that you don't mind sacrificing for using only for lip balm. You don't want to eat that stuff.

Resources

Mabel White Home Living Corp.
This company has an extensive selection of flavor oils. They also have an extensive selection of everything else you'd need, including shrink bands to seal tubes and jars, plus instructional videos.
Majestic Mountain Sage
We bought vegan base and the tube holder from here. They also have a comprehensive stock of lip balm supplies.
http://www.thesage.com/

Not Martha
This blog has good illustrated step-by-step instructions for making lip balm that features the double-boiler method of melting the base.
The Chemistry Store
http://www.chemistrystore.com/
We bought tubes from here. They also sell all the other basic and special lip balm making supplies.

11 May 2007

Plushie Tutorial!

Who wants to learn how to make adorable plushies like these? They are super simple and once you learn the basic skill of the plushie, you can apply the skill to any shape or design you desire!

Here's what you'll need: colored felt and fabric, needle, thread (matching body design), scissors, buttons, stuffing, and a sewing machine (optional if you are an efficient hand-sewer):


Step 1: Cut out desired shapes of both leaves and body of carrot while leaving a little room (making it fatter) on the edges to allow for sewing. You can either draw your desired shape on the fabric and cut it out or cut it free form:
Step 2: Run leaves through sewing machine to add desired embellishment detailing with stitching:


Step 3: Make sure the "wrong sides" (the side you don't want showing) of the carrot are facing outwards on both sides and sandwich the leaves between them. You will want to invert the leaves on the inside of the carrot facing down with the base of them sticking out a little past the edges of the carrot fabric sides:
Step 4: Pin your fabric in place securely and begin to slowly run it through the machine on the edges of the carrot fabric. (I prefer to start on the side of the carrot and work my way around the top where the leaves are):


Step 5: Stop sewing when you reach around the side of the carrot that you began with leaving an opening in the same side: Step 6: Turn carrot completely inside out and begin to slowly stuff it with your polyfil or desired stuffing material:
Step 7: After stuffing the carrot to your desired fill, sew up the opening in the carrot by hand with needle and a thread matching the body of the carrot. You will want to sew the sides as close to the seam as possible, trying to conceal the stitching:
Step 8: Tie a knot in the thread when you have finished stitching the opening tight and trim all loose threads, and any stuffing that may be on the seam:
Step 9: Applique/sew on two of your desired buttons for eyes:
And now you have a new friend:
Maybe now you can make new friends for your little carrot like these:

10 May 2007

Make Your Own Damn Buttons


Hey guys guess what! You can totally make your own buttons using key ring protectors and embroidery thread! If you have old key ring protectors like these lying around:


you can turn them into something beautiful and useful by following these simple steps.

Take a piece of embroidery thread and measure about three arm lengths of it. Thread it through an embroidery needle. Thread this through the key ring protector by bringing the thread through the back, looping it around the side of the key ring, and then bringing it through the back of the center of the ring again.


You will then have to make a knot by slipping the needle through the loop that is created when you draw the needle through the center. This loop disappears if you pull the thread too tight so a little finesse is required. When you make this knot, make sure that you pull the thread towards you, from the back of the loop to the front.


Repeat this process until your ring is covered.


A small seam will be created where your knots were. Push this seam to the back of your ring.

Now pull your thread straight across from one side of your ring to the other. Loop it under the ring and back across to where you started. Repeat this process, moving around the ring until you have 6 or 8 spokes, wichever you prefer.


Tighten and straighten the spokes by making a loop around the center and pulling gently. Next, start weaving your thread in and out of the spokes. Alternate going under one spoke and then over the next.


When you have filled in your button, bring the needle to the back of the button and make a knot in the center. Do this by taking the needle under a piece of thread and pulling it all the way through.


Then, take it through again but this time don't pull it all the way. Instead, when you have pulled it far enough that there is a small loop, pull the needle through this loop and make a tight knot.


Trim your thread so the back of the button is clean. Ta-da! You have a button.


The pink button has another embellishment. After I finished filling in the spokes, I wrapped thread around the four individual spokes that were showing on the front of the button. This adds texture and scintillating visual interest. There are many ways you can expand on this basic technique - changing thread colors, stringing beads onto your thread, changing thread direction, etc. It's fun, and you can do it while you watch What Not to Wear (or any other show). Sweet.